A Guide to Forks on GitHub Forks#
What You Will Learn
In this lesson, you’ll learn how to fork (copy) a GitHub repository to your own account. Forking lets you work on a project independently before suggesting changes.
What is forking and why use it?#
Forking a repository creates a copy in your GitHub account while keeping a link to the original.
Edit without concern: Work on your fork without affecting the original project.
Stay up to date: Sync your fork with the latest changes from the original repo.
Propose changes: Suggest edits by submitting a pull request to the original repository.
Example: You want to fix a typo in a project’s documentation. Instead of requesting permission, you fork the repo, make the fix, and submit a pull request with your update.
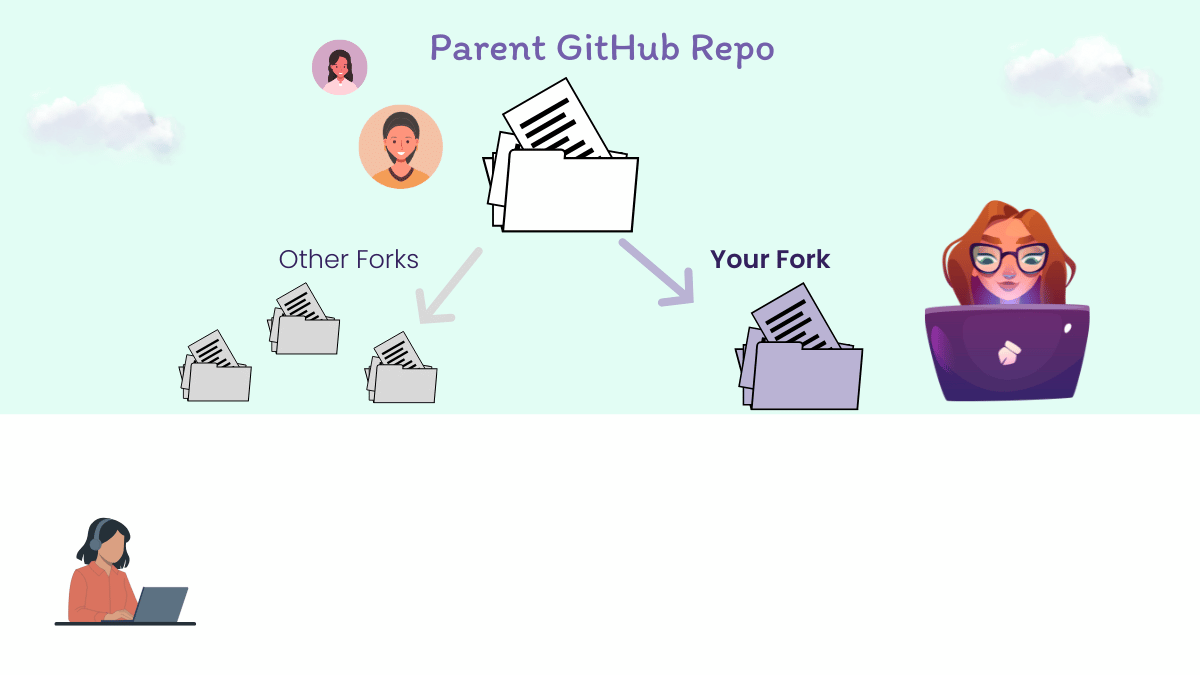
When you fork a GitHub repository, you make a copy of the files and the commit history into your personal account. This allows you to work on the files independently before suggesting changes through a pull request to make to the parent repository you forked from.#
By forking, everyone collaborates on their own copies of the project, ensuring the original files stay intact. All changes are tracked in the file history and can be undone if needed. You can fork a repository directly from its main page on GitHub.com.
How to fork a GitHub repository#
To fork a GitHub repository:
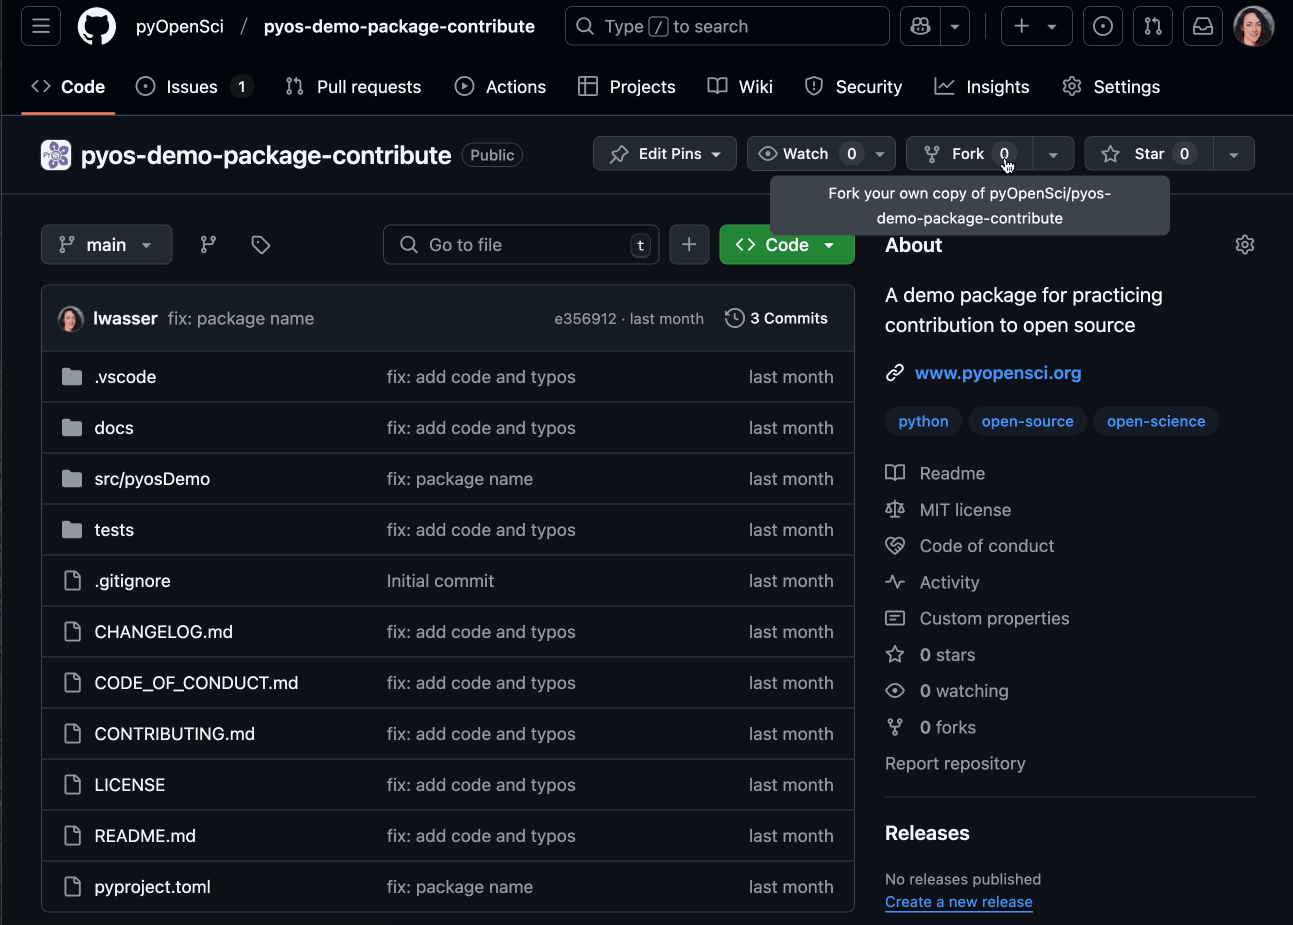
Go to the repository page you want to fork: pyopensci/pyos-demo-package-contribute).
Click the Fork button in the top-right corner.
Choose your GitHub account as the destination.
Wait for GitHub to create your fork. You’ll now have a copy in your account!
The URL of your fork will be:
https://github.com/your-username/pyos-demo-package-contribute
Tip
The number next to the button tells you how many times other users have forked the repository.
To fork a repo, navigate to it on GitHub and click the Fork button. Your copy will appear under your account.#
Who owns the repo?
Every GitHub repository has an owner, which can be:
An individual (e.g.,
https://github.com/username/repository-name).An organization (e.g.,
https://github.com/org-name/repository-name).
The owner’s username appears first in the URL, showing who controls the repository.
Example:
A personal repo:
https://github.com/your-gh-username/my-projectAn organization-owned repo:
https://github.com/pyOpenSci/repo-name
If you fork a repo, your GitHub username becomes the owner of the fork:
Forked URL:
https://github.com/your-username/repository-name
What happens after you fork a repo?#
Your fork is a separate copy, but it remains linked to the original repository.
Your fork is stored at:
https://github.com/your-username/repository-nameThe original repo stays at:
https://github.com/original-owner/repository-name
You can now:
Make changes without affecting the original repository.
Keep your fork updated as the original repo evolves.
Submit changes back using a pull request.
Keep your fork in sync#
Your fork doesn’t automatically get updated when the original repository is updated. Periodically, you will need to sync your fork to keep it current.
To sync a GitHub fork:
Go to your fork on GitHub.
Click the Sync fork button (available on GitHub’s UI).
Your fork’s main branch will now match the latest version of the original repository. This means that it has the most recent commits that have been made to the parent repository.
Takeaways#
✅ Forking creates a personal copy of a repository that you can edit freely.
✅ Your fork stays linked to the original repo, allowing you to propose changes.
✅ Sync your fork regularly to keep it up to date if you plan to contribute to the repo more over time.
Next steps
Now that you’ve forked a repository, the next step is to edit a file and commit your changes.
Learn how to edit and commit files →