Python パッケージングガイドへの貢献#
ガイドはコミュニティの情報源です。
TL;DR#
issueやプルリクエストという形での貢献を歓迎します:
ガイドに含めるべきもののアイデアがあれば、 ここにissueを開いてください 。
もしタイプミスを見つけたら、遠慮なく submit a pull request して直接テキストを修正してください。 あるいは、プルリクエストに抵抗がある場合は、遠慮なくissueを開いてください。
このガイドを他の言語に翻訳することに興味がある方は、 翻訳ガイド をご覧ください。
ガイドブックの内容をもっと大きく変えてほしいという方は、まずissueを投稿してください!
どのように貢献すればいいのかわからない、あるいはgitやgithubに詳しくないという方は、このガイドを参考にしてください。
Python パッケージングガイドの構成#
Python パッケージングガイドは myST (MarkDown と rST の変種) で書かれており、 Sphinx という Python で構築されたドキュメントエンジンを使って、オンラインに表示される HTML バージョンをビルドしています。
ガイドの作成プロセスを管理するためにNoxというツールを使っています。
貢献するための2つのアプローチ#
このガイドには2つの方法で貢献することができます。
最初のアプローチは、あなたのコンピュータにあるガイドのローカルコピーを使用することです。 このオプションは、より複雑なセットアップを必要としますが、プルリクエストを提出する前に、ガイドをローカルでビルドし、あなたの貢献がバグを引き起こしていないことを確認することができます。 これは、新しいセクション全体を書くような、より大きな貢献のために推奨されるアプローチです。
二つ目の方法は、GitHub のウェブサイトで直接貢献する方法です。 この方法ではコンピュータのセットアップは不要で、PRを投稿した時点であなたの貢献は (継続的インテグレーション) テストされますが、問題が発生した場合にフィードバックを得るまでに時間がかかります。 誤字脱字の修正のような小さな貢献をする場合や、オープンソースへの貢献が初めてで、最初のアプローチが敷居が高いと感じる場合に最適な方法です。
リポジトリをフォークする#
どの方法を選ぶかは別として、最初のステップは Python Packaging Guide のリポジトリを個人の GitHub スペースにフォークすることです。 リポジトリページの右上にある "Fork "ボタンをクリックすることでできます。
さらに詳しく: GitHub ReposのFork と Clone は、フォークについて学ぶのに良いリソースです。
レポジトリをフォークする、
GitHubにログインしていることを確認してください。
Go to the repo you would like to fork, in this case the Python Packaging Guide repo.
ページの右上に 'Fork' ボタンがあります。そのボタンをクリックしてください。 新しいページが表示され、そこで '新しいフォークを作成' します。 デフォルトの入力のまま、'Create fork' をクリックします。 これで、
https://github.com/<username>1/python-package-guideにリポジトリのコピーが作成されます。<username>はあなたの GitHub ユーザー名です。
GitHubウェブサイトを通じて貢献する#
MarkDownファイルの編集方法#
Python パッケージングガイドは、MarkDown の変種である myST で書かれています。GitHubのウェブサイトでファイルを直接編集できます。編集したいファイルに移動し、ファイルの右上にある鉛筆のアイコンをクリックします。
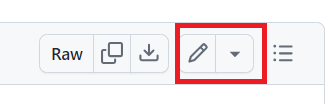
GitHubでファイルを編集する方法を示す画像です。鉛筆のアイコンは赤い四角形で強調表示されます。#
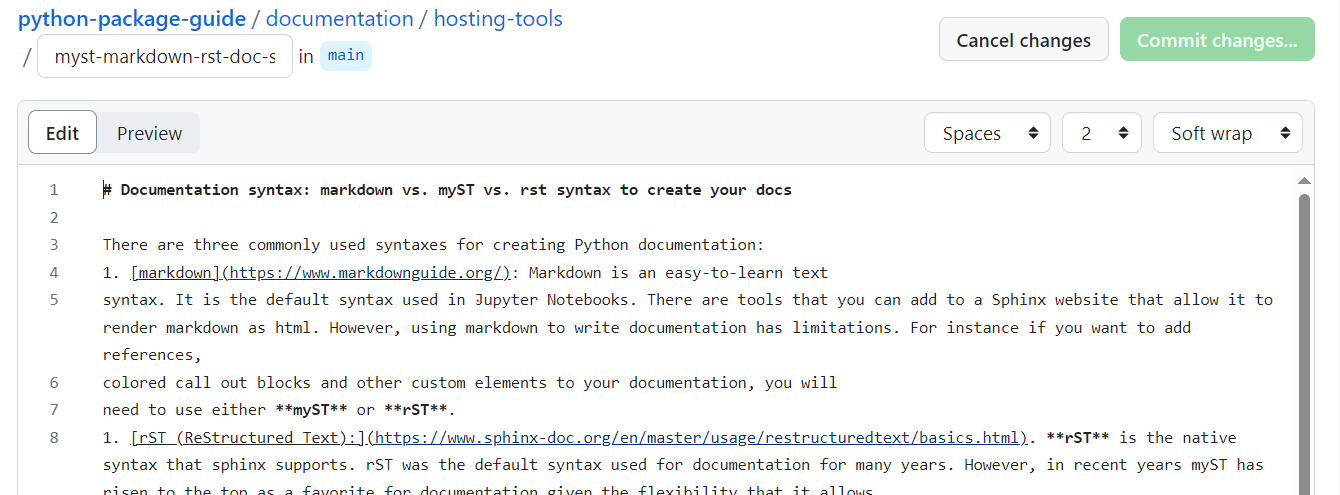
GitHubでファイルが編集されているときに表示される画像です。 ファイルの内容はテキストエディタで表示されます。#
変更をプレビューするには、 "Preview changes" タブをクリックします。
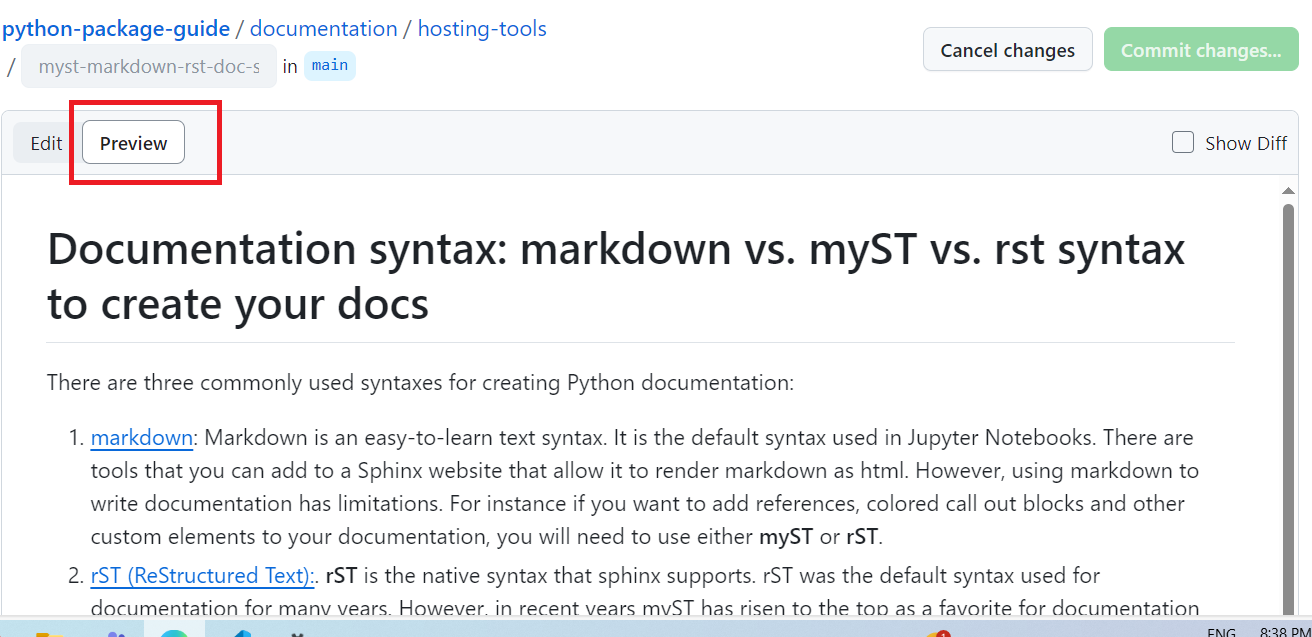
GitHub で変更をプレビューする方法を示す画像です。 ファイルの内容はテキストエディタで表示されます。 プレビュー変更タブは赤い四角で強調表示されます。#
変更をコミットする方法#
ファイルの編集が終わったら、ページの下までスクロールしてください。 "変更をコミット" というセクションが表示されます。ここでは、変更内容のタイトルと説明を書くことができます。タイトルは、あなたが行った変更を説明する明確で簡潔なものにしましょう。
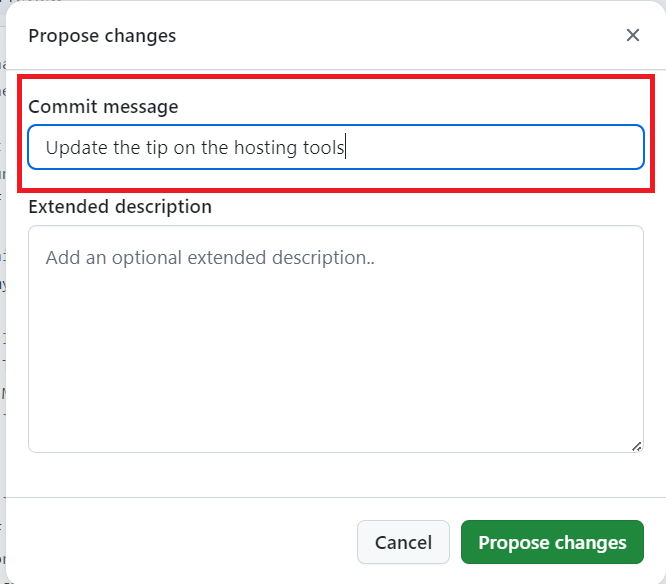
GitHub で変更をコミットする方法を示す画像です。コミットのメッセージはテキストエディタで表示されます。 コミット変更セクションは赤い四角で強調表示されます。#
コミットメッセージを書いたら、 "Commit changes" ボタンをクリックして変更を保存します。
あなたのコンピュータでローカルに貢献する#
フォークしたリポジトリをクローンする#
フォークしたリポジトリを自分のコンピューターにクローンするには、フォークしたリポジトリのURLをコピーし、ターミナルで以下のコマンドを実行する必要があります:
git clone <URL>
<URL> をフォークしたリポジトリのURLに置き換えてください。URLは、フォークしたリポジトリページの緑色の "Code" ボタンをクリックすると表示されます。
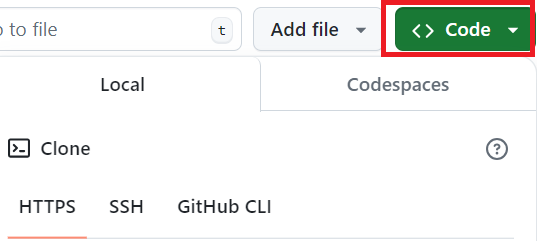
GitHubでリポジトリをクローンする方法を示す画像です。 リポジトリのURLがテキストエディタに表示されます。 コードボタンは赤い四角で強調表示されます。#
新しいブランチを作る#
変更を加える前に、作業をする新しいブランチを作成してください。こうすることで、あなたの変更をメインブランチから切り離すことができ、プルリクエストを提出しやすくなります。
新しいブランチを作成するには、ターミナルで以下のコマンドを実行します:
git checkout -b <branch-name>
仮想環境を作る#
ガイドをローカルでビルドするには、仮想環境を作成し、依存関係をインストールする必要があります。ターミナルで以下のコマンドを実行すれば可能です:
Windows:
python -m venv .venv
.venv\Scripts\activate
MacOS と Linux:
python -m venv .venv
source .venv/bin/activate
開発依存パッケージをインストールする#
開発依存関係をインストールするには、ターミナルで以下のコマンドを実行します:
python -m pip install -e .[dev]
変更をコミットする#
変更を加えたら、ローカルリポジトリにコミットする必要があります。 これを行うには、ターミナルで以下のコマンドを実行します:
変更を確認するには:
git status変更をステージングエリアに追加するには:
git add .
変更をコミットするには:
git commit -m "Your commit message here"
"Your commit message here" を、あなたが行った変更を説明する明確で簡潔なメッセージに置き換えてください。
ローカルでのガイドのビルド方法#
ガイドをローカルにビルドするには、noxコマンドを使うことができます。これはデフォルトの nox セッションを実行し、ガイドをビルドしてブラウザで開きます。
利用可能なさまざまなセッションを確認するには、ターミナルで次のコマンドを実行します:
nox --list-sessions
noxには、ドキュメントの作成に関連するさまざまなセッションがあります: docs, docs-test, docs-live 。 nox コマンドの後にセッション名を指定して実行することができます。
docs: このセッションでガイドを作成し、ブラウザで開きます。nox -e docs
ローカルに構築されたガイドを見るには、ブラウザで
_build/html/index.htmlファイルを開いてください。docs-linkcheck: this session checks that links in documentation worknox -e docs-linkcheck
If the tests fail, you will see logs in the terminal and in
_build/linkcheck_output/output.txt.docs-test: このセッションでは、ガイドのテストを実行します。nox -e docs-test
テストが失敗すると、ターミナルにエラーメッセージが表示されます。 プルリクエストを提出する前にエラーを修正する必要があります。
docs-live: このセッションでガイドを作成し、ライブリローディングしてブラウザで開きます。nox -e docs-live
ターミナルに表示されている
localhostのブラウザでローカル版のガイドを開いてください。
プルリクエストを提出する前に#
プルリクエストを提出する前に、必ずテストを実行し、コードのフォーマットをチェックしてください。
nox -e docs-test
テストに失敗すると、ターミナルにエラーメッセージが表示されます。 プルリクエストを提出する前にエラーを修正する必要があります。 また、ドキュメントをローカルでビルドし、変更が正しく見えるかどうかをチェックすることで、ドキュメントのフォーマットを確認してください。
あなたの貢献のプルリクエストを投稿する#
プルリクエストの作り方#
GitHubでプルリクエストを開くには、フォークしたリポジトリのメインページに移動し、 "Pull requests" タブをクリックします。
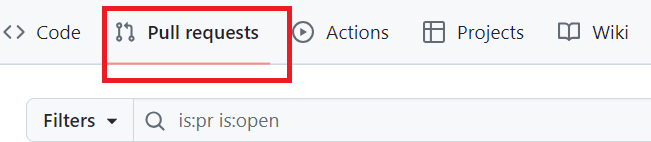
GitHubのプルリクエストタブへの移動方法を示す画像です。プルリクエストタブは赤い四角で強調表示されます。#
"New pull request" ボタンをクリックします。
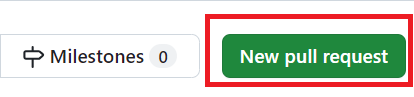
GitHubで新しいプルリクエストを作成する方法を示す画像です。 新しいプルリクエストボタンは赤い四角で強調表示されます。#
プルリクエストのタイトルと説明を明確かつ簡潔に書きましょう。変更した内容と、それが必要な理由を必ず説明してください。
プルリクエストを提出するとどうなるか(CI/CD)#
あなたがプルリクエストを提出すると、あなたの変更がバグやエラーを引き起こさないように、一連のチェックが実行されます。これらのチェックには以下が含まれます:
コードのフォーマットとスタイル: は、あなたのコードが
pre-commit.ci - pr checkによって正しくフォーマットされているかをチェックします。ドキュメントビルド: は、
circleciを使用して、ドキュメントが正しくビルドされることをチェックします。
プルリクエストには、これらのチェックのステータスが表示されます。

GitHubのプルリクエストのチェック状況を示す画像です。チェックは表で表示され、各チェックの横にステータスアイコンが表示されます。 チェックは赤い四角で強調表示されます。#
これらのチェックのいずれかが失敗した場合、プルリクエストにエラーメッセージが表示されます。変更をマージする前に、エラーを修正する必要があります。
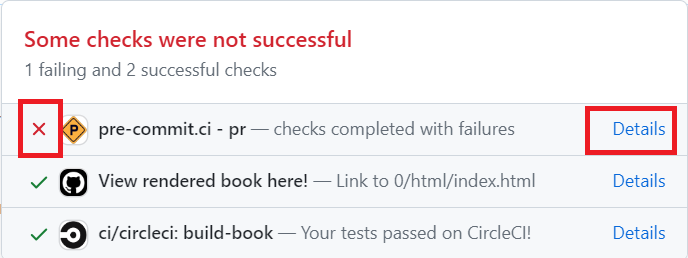
GitHubのプルリクエストのチェック状況を示す画像です。チェックは表で表示され、各チェックの横にステータスアイコンが表示されます。 失敗と詳細リンクのチェックは赤い四角で強調表示されます。#
エラーに関する詳細情報を得るには、失敗したチェックの隣にある "Details" リンクをクリックすることができます。
レビュープロセスに期待すること#
プルリクエストを提出すると、リポジトリのメンテナがあなたの変更を確認し、フィードバックを提供します。審査プロセスには以下が含まれます:
Comments: レビュアーはあなたのプルリクエストにコメントを残し、質問やフィードバックをすることができます。
Suggestions: レビューワーは、あなたのコードや文書の変更を提案するかもしれません。
Approvals: レビュアーがあなたの変更に満足したら、プルリクエストを承認します。
新しいコミットをブランチにプッシュすることで、プルリクエストに変更を加えることができます。プルリクエストはあなたの新しい変更で自動的に更新されます。
あなたのプルリクエストが承認されると、メインブランチにマージされ、あなたの変更がガイドに含まれます。
追加ヘルプ#
助けを求めるには#
TODO: このセクションには、初心者の投稿者がさらに助けを必要とする場合に備えて、より多くの助けを見つけるためのオプション (イシューの作成、フォーラムへの投稿など) を記述してください。
その他のリソース#
TODO: また、GitHubのドキュメントのような初心者向けのドキュメントへのリンクも含める必要があります。
書き添える#
コード例#
このガイドでは、可能な限り iteralinclude Sphinx ディレクティブ を使用して、コードと散文を分けています。 ドキュメントで使用するコードは examples/ フォルダにあります。
ドキュメントでコードを参照する#
使用したい例がドキュメントの他の場所にある場合、 literalinclude ディレクティブをそのままコピーすれば、例は同期されたままになります。
すでに example フォルダに新しいドキュメントに使えそうなコードがある場合は、新しい literalinclude を作成して、それをサイトに展開することができます。 動作する literalinclude に必要なのはコードへの相対パスだけですが、ほとんどの場合 :language: と :lines: も指定する必要があります。 前者はコード例をより美しくし、後者は将来的なコードの変更からサンプルを守ることができます。
プロからのヒント : :lines: の代わりに :start-after:, :start-at:, :end-before:, :end-at: オプションもあります。 また、サンプルコードがPythonの場合、 :pyobject: を使用すると、コードのリファクタリングがあっても同じドキュメント内容を維持することができます。
examples/ にまだ存在しないサンプルコードが必要な場合は、 ドキュメント用のコードを作成する を参照してください。
ドキュメント用コードの作成#
コードブロックが役立つ場所に出くわしたら、コードフェンス (``` ブロックテキスト)と一緒にインラインで書く代わりに、独自の形式でファイルとして書くことができます。 あなたの例はすでに存在しているかもしれません; ドキュメントのコードを参照する を参照してください。
既存のサンプルファイルのどれにも当てはまらない新しいサンプルを追加したい場合は、新しいファイルを作成して literalinclude ブロックで参照することができます。 もしそのファイルが既存のサンプルプロジェクトの中にあるのが理にかなっているのであれば、そこに追加してください。そうでなければ、 examples ディレクトリに新しいフォルダを作成してください。
既存の例が不完全であったり、新しい例を既存のファイルに追加することに意味がある場合は、先に進んで追加してください。 可能な限り、例を書き直すのではなく、拡張してください。 例えば、ファイルの最後に新しい関数を追加したり、クラス内の既存のメソッドの後に新しいメソッドを追加したりします。
例題のコードは正しさをチェックされるので、新しい例題を追加するには、カバレッジのためのテストを追加する必要があるかもしれないし、失敗したテストを修正する必要があるかもしれません。
⚠️ 警告: 既存のサンプル・コードを変更する場合、特にファイルの末尾に追加する以上の変更を加える場合は、細心の注意が必要です。 すべてのコード例は(潜在的に)共有例です。 これにより、ガイド内のサンプルはより一貫したものになりますが、ある特定のユースケースのためにサンプルを修正する場合、アクションが遠のく可能性があります。 もし既存のサンプルを修正することに気づいたら、このコマンドを実行し、新しいビルドでそれらのページをチェックしてみてください。
grep -lr '\.\./examples/path/to/modified\.py' documentation/
例:
このようにマークダウンでサンプルコードを書くのではなく
Here is an example Python function:

```python
def is_empty(x):
    return not bool(len(x))
```
python は .py ファイルに展開することができます。
def is_empty(x):
    return not bool(len(x))
Here is an example Python function:

:::{literalinclude} ../examples/contributing_example.py
:language: python
:lines: 1-2
別の例として、 pyproject.toml の一部だけを表示する必要がある場合、我々はすでに完全なプロジェクト定義を持っているので、関連する部分を見つけるだけでよいです。
こう書く代わりに
Classifiers are just a list of plain strings
```toml
classifiers = [
    "Programming Language :: Python :: 3",
    "Operating System :: OS Independent",
]
```
例は、既存のtomlファイルから抽出することができます
:::{literalinclude} ../examples/pure-hatch/pyproject.toml
:language: toml
:start-at: classifiers = [
:end-at: ]